Introduction to Java
Java is a high-level, class-based, object-oriented programming language that is designed to have as few implementation dependencies as possible. It was developed by Sun Microsystems (now owned by Oracle Corporation) and released in 1995. Java is widely used for building enterprise-scale applications, Android apps, web applications, and software tools.
Java follows the principle of "Write Once, Run Anywhere" (WORA), meaning compiled Java code can run on all platforms that support Java without the need for recompilation. This cross-platform capability is possible because of the Java Virtual Machine (JVM).
History & Features of Java
History:
- 1991: Java project initiated by James Gosling, Mike Sheridan, and Patrick Naughton as part of the Green Project.
- 1995: Officially launched by Sun Microsystems as Java 1.0.
- 2006: Sun Microsystems released Java as open-source software under the GNU General Public License.
- 2010: Oracle Corporation acquired Sun Microsystems and took over Java development.
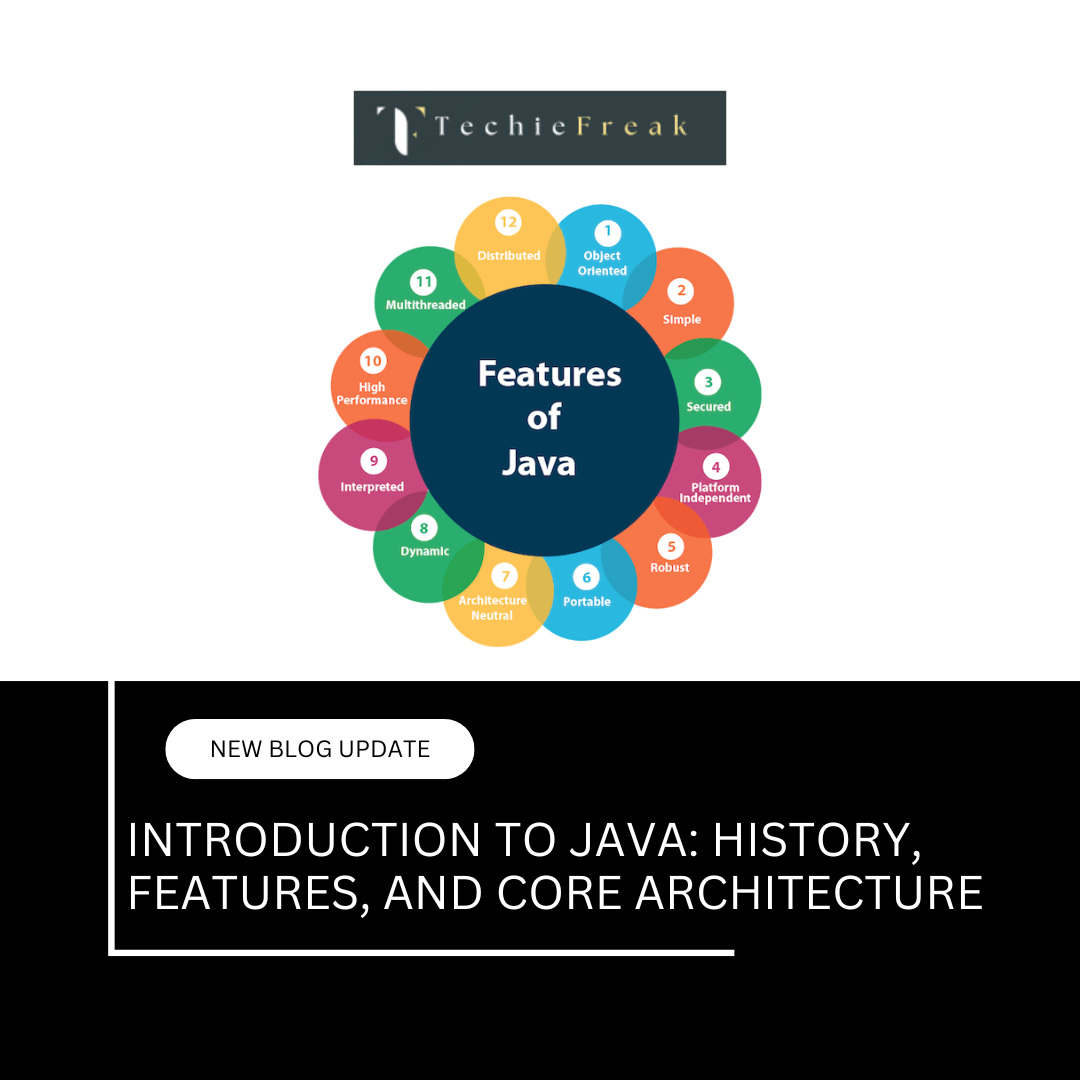
Key Features:
- Platform Independent: Java programs run on any system that has the JVM.
- Object-Oriented: Everything in Java is treated as an object.
- Simple and Familiar: Java has a syntax similar to C++, making it easier for developers to learn.
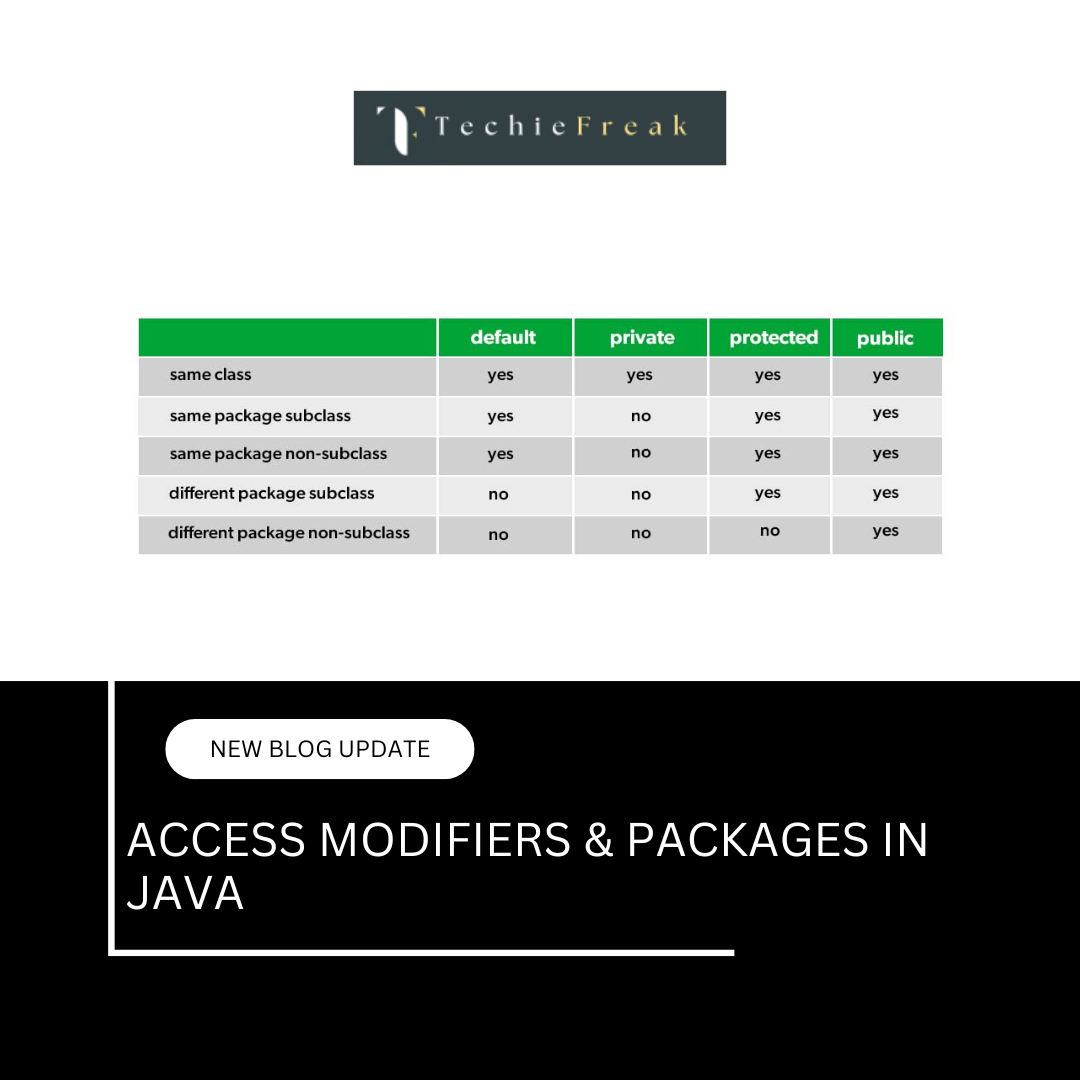
- Secure: Java provides a secure environment using its runtime and access modifiers.
- Robust: Java emphasizes early checking for possible errors, and it uses strong memory management.
- Multithreaded: Java supports multithreaded programming which allows performing many tasks simultaneously.
- Distributed: Java has networking facilities to write programs that can access resources across the internet.
- Portable: Java code is portable because of bytecode, which can run on any system with JVM.
- High Performance: Although Java is interpreted, its performance is enhanced using Just-In-Time (JIT) compilers.
- Dynamic: Java is capable of adapting to an evolving environment and can load classes dynamically at runtime.
How Java Works (JVM, JRE, JDK)
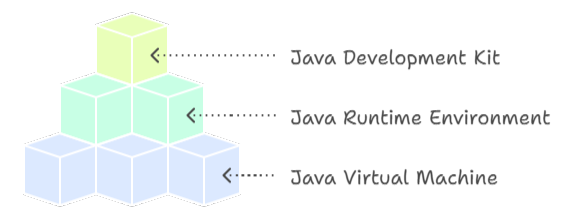
Understanding how Java works internally is essential for every developer, especially when working across platforms and managing environments. The three key components that enable Java to function smoothly are:
- Java Virtual Machine (JVM)
- Java Runtime Environment (JRE)
- Java Development Kit (JDK)
Java Virtual Machine (JVM)
The Java Virtual Machine (JVM) is the heart of the Java platform. It is an abstract computing machine that enables your computer to run Java programs by providing a runtime environment.
Key Functions:
- Platform Independence: JVM allows Java programs to be written once and run anywhere (WORA – Write Once, Run Anywhere), as it handles platform-specific operations.
- Bytecode Execution: It converts compiled Java bytecode (.class files) into machine-specific code for execution.
- Memory Management: JVM handles memory allocation, garbage collection, and thread management automatically.
Components of JVM:
- Class Loader: Loads compiled class files into memory.
- Bytecode Verifier: Ensures the code follows security and integrity rules.
- Interpreter: Reads and executes bytecode instructions one by one.
- Just-In-Time (JIT) Compiler: Improves performance by compiling bytecode into native machine code during runtime.
Summary: JVM makes Java portable, secure, and reliable by handling the execution of programs across platforms.
Java Runtime Environment (JRE)
The Java Runtime Environment (JRE) is a software package that provides the libraries, Java Virtual Machine (JVM), and other resources required to run Java applications.
Key Points:
- It includes JVM + Java class libraries + other supporting files.
- It does not contain tools for developing Java programs such as compilers or debuggers.
- It is suitable for end users who want to run Java applications but not create them.
Use Case: If you're installing Java on a machine just to run an application (like Minecraft or enterprise software), JRE is sufficient.
Java Development Kit (JDK)
The Java Development Kit (JDK) is a full-featured software development kit used to develop Java applications. It includes everything available in JRE, plus development tools.
Key Tools in JDK:
- javac: Java compiler
- java: Java application launcher
- javadoc: Documentation generator
- jdb: Debugger
- jar: Archiver for packaging class files into JAR files
Editions of JDK:
- JDK SE (Standard Edition): For developing desktop and server applications.
- JDK EE (Enterprise Edition): Adds tools for developing large-scale enterprise applications (includes Servlets, JSP, etc.).
- JDK ME (Micro Edition): Designed for mobile and embedded systems like smart cards, sensors, and IoT devices.
Summary: JDK = JRE + Developer Tools. It is essential for writing, compiling, and debugging Java programs.
How They Work Together
- You write Java code and save it in a .java file.
- JDK's javac compiler converts this code into bytecode and generates a .class file.
- JRE loads the bytecode, and the JVM interprets or compiles it into machine-specific instructions.
- The program runs, regardless of the underlying operating system, as long as a JVM is available.
This separation of code development (JDK), program execution (JRE), and platform-specific translation (JVM) is what makes Java powerful, portable, and efficient across all environments.
Installing Java & Setting up IDE (Eclipse/IntelliJ)
1. Installing Java:
- Step 1: Download JDK
- Visit https://www.oracle.com/java/technologies/javase-downloads.html
- Choose the correct version for your OS (Windows/macOS/Linux).
- Step 2: Install JDK
- Run the installer and follow on-screen instructions.
- Note the installation path (e.g., C:\Program Files\Java\jdk-XX).
- Step 3: Set Environment Variables (Windows)
- Go to System Properties > Advanced > Environment Variables.
- Under System Variables:
- Add JAVA_HOME and set its value to the JDK path.
- Edit Path and add %JAVA_HOME%\bin
- Open Command Prompt and type java -version and javac -version to verify installation.
2. Installing an IDE (Integrated Development Environment):
Option 1: Eclipse IDE
- Download from https://www.eclipse.org/downloads/
- Choose "Eclipse IDE for Java Developers".
- Install it and launch the application.
- Create a new workspace when prompted.
- Go to File > New > Java Project to start coding.
Option 2: IntelliJ IDEA
- Download from https://www.jetbrains.com/idea/
- Choose the Community Edition (free) or Ultimate (paid).
- Run the installer and launch IntelliJ IDEA.
- Configure JDK in File > Project Structure > SDKs.
- Create a new Java project and begin coding.
Conclusion:
Java is a versatile and powerful language used in countless real-world applications. With the right tools and setup—JDK, JVM, JRE, and an IDE like Eclipse or IntelliJ—you’re ready to start developing Java programs. Understanding the history and architecture of Java helps build a strong foundation for further learning in Java development.
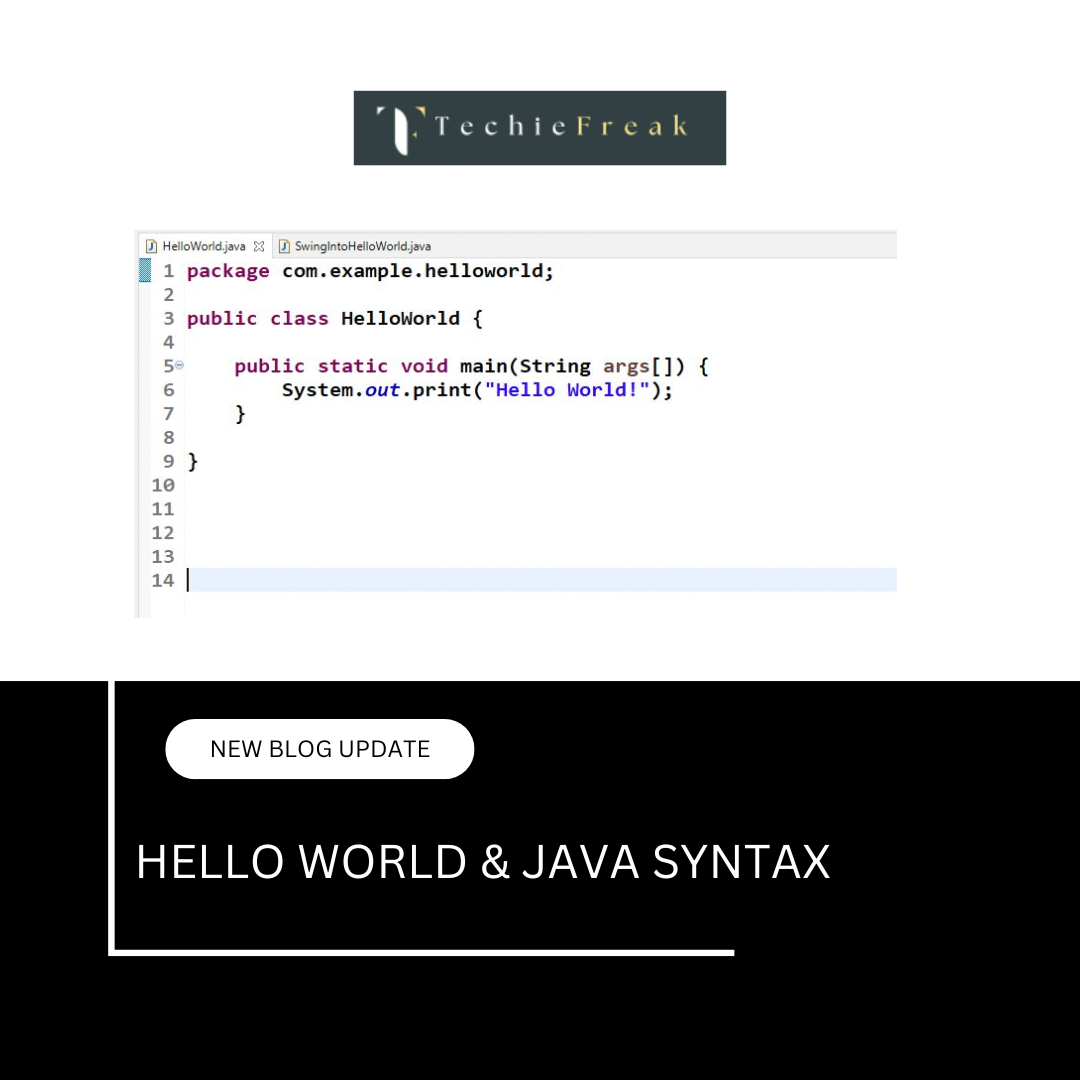
Next Blog- Hello World & Java Syntax

 Basics.png)